When we built Aria, we wanted it to function for both professional engineers as well as users who are just starting out with pro audio. Mastering with Aria is much like writing a song–you get to decide how simple or how complex the process is. In this article we’re going to talk about using Aria–the process, using the mix types, remastering and more. We’ll also throw in a few tips and tricks along the way. By the end of this article, you’ll be ready to give your song a polished sound with the emotion you can only get from high-end analog gear.
First off, it’s important to remember what mastering does (and what it doesn’t do).
Mastering makes sure that your song sounds as good as possible for every format, every platform, every device and every speaker. >First, mastering improves the listening experience by ensuring a consistent volume level, so your song can sit alongside other mastered tracks on streaming services like Apple Music, Tidal & Spotify. Mastering also makes it easier on your listener’s ears by improving the sound quality of the audio and the tonal balance by creating an even distribution of frequencies and adding some special polish to make your song as emotional as possible.
Mastering won’t magically “fix” deficiencies in your song. If you’re expecting mastering to take your one track of guitar and make it sound like an army of huge, multi-tracked guitars, you’re going to be very disappointed.
But Aria WILL make your song sound more balanced and ready for your listener’s ears. So, as you get started, here are a couple of important things to consider making sure you’re getting the most out of your Aria experience.
Learn the Mix Type Settings
Aria starts with five exclusive Mix Type Settings that we think, depending on the type of mix & song that you have, will give you the best results. Keep in mind that since it is an analog mastering system much of the system is based on input level, not output level. To find the one that’s best for your song, try to think about the Mix Type descriptions as if they are talking about your mix. Just like trying to find the perfect plugin for a track, or perfect microphone for a vocalist, it’s important to determine what kind of a mix you’re starting with.
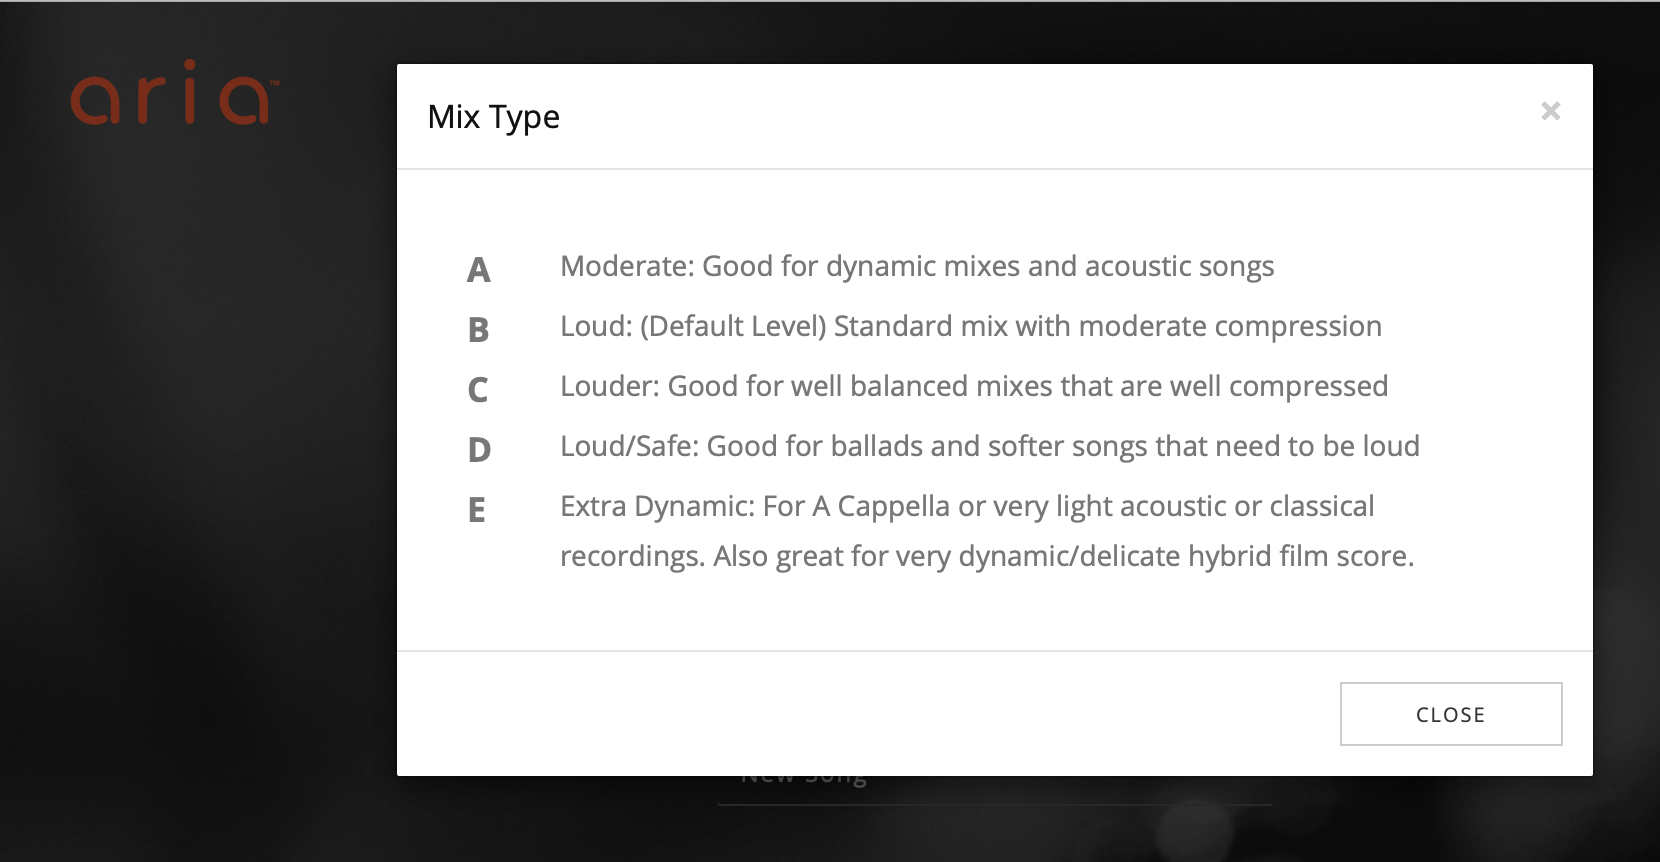
A -Moderate: Good for dynamic mixes and acoustic songs, this setting has fairly transparent settings. It was designed to incur as little artifacting as possible through the compression stages.
B -Loud: (Default Level) Standard mix with medium compression, this is a setting that you’d use for a typical commercial rock or hip-hop type record. This setting pushes the master a little bit more aggressively and has a different impression curve. This setting is a really great start if you want to add some bite to the master.
C -Louder: Good for well balanced mixes that are very well compressed. This setting is designed for EDM, Pop, Hard Rock type songs where the multiple compression stages really round things out and prepares your song for a very loud playback.
D -Loud/Safe: Good for ballads and softer songs that need to be loud. This setting is more nuanced–it adds a slightly louder output. For instance, if you’ve got a song on a record that is a ballad that is sequenced between some very loud, club-style songs, D would be a slightly louder version of the A so that you don’t hear a tremendous drop in level going from one song to the next.
E -Extra Dynamic: The is the most conservative setting. For A Cappella, light acoustic or classical recordings. Also great for very dynamic/delicate hybrid film score. With this setting, the song barely hits the limiting stage at all. This setting is also the perfect one to use if you want to use Aria as a processor for samples, drum tracks or anything other audio that you want to add a little extra magic.
Sometimes it’s easier to ask questions about your mix and then match it to the right Mix Type.
Did you heavily compress and limit your master bus? If the answer is yes, maybe Mix Type C would be good for that.
Did you hardly use any compression and your mix changes level and is very dynamic? Maybe A or E would be good?
If you’re just starting out and don’t know which Mix Type fits your song, that’s ok too. It’s the reason that we let you preview fifteen seconds of your song for free and we encourage to try all possible mix types to make sure you are getting the best out of Aria.
Listen, Listen, and Then Listen Some More
When you download your master, make sure and give it a good listen in as many different settings and on as many different sources as possible. This will give you a well-rounded idea of any tweaks that you might need to make. It also will help you give you a better idea of how your listener will experience the track, since they’ll be listening to it on headphones, car speakers, home theaters and more. The goal with mastering is to get your song ready for any format on any device or setup.

Make Adjustments
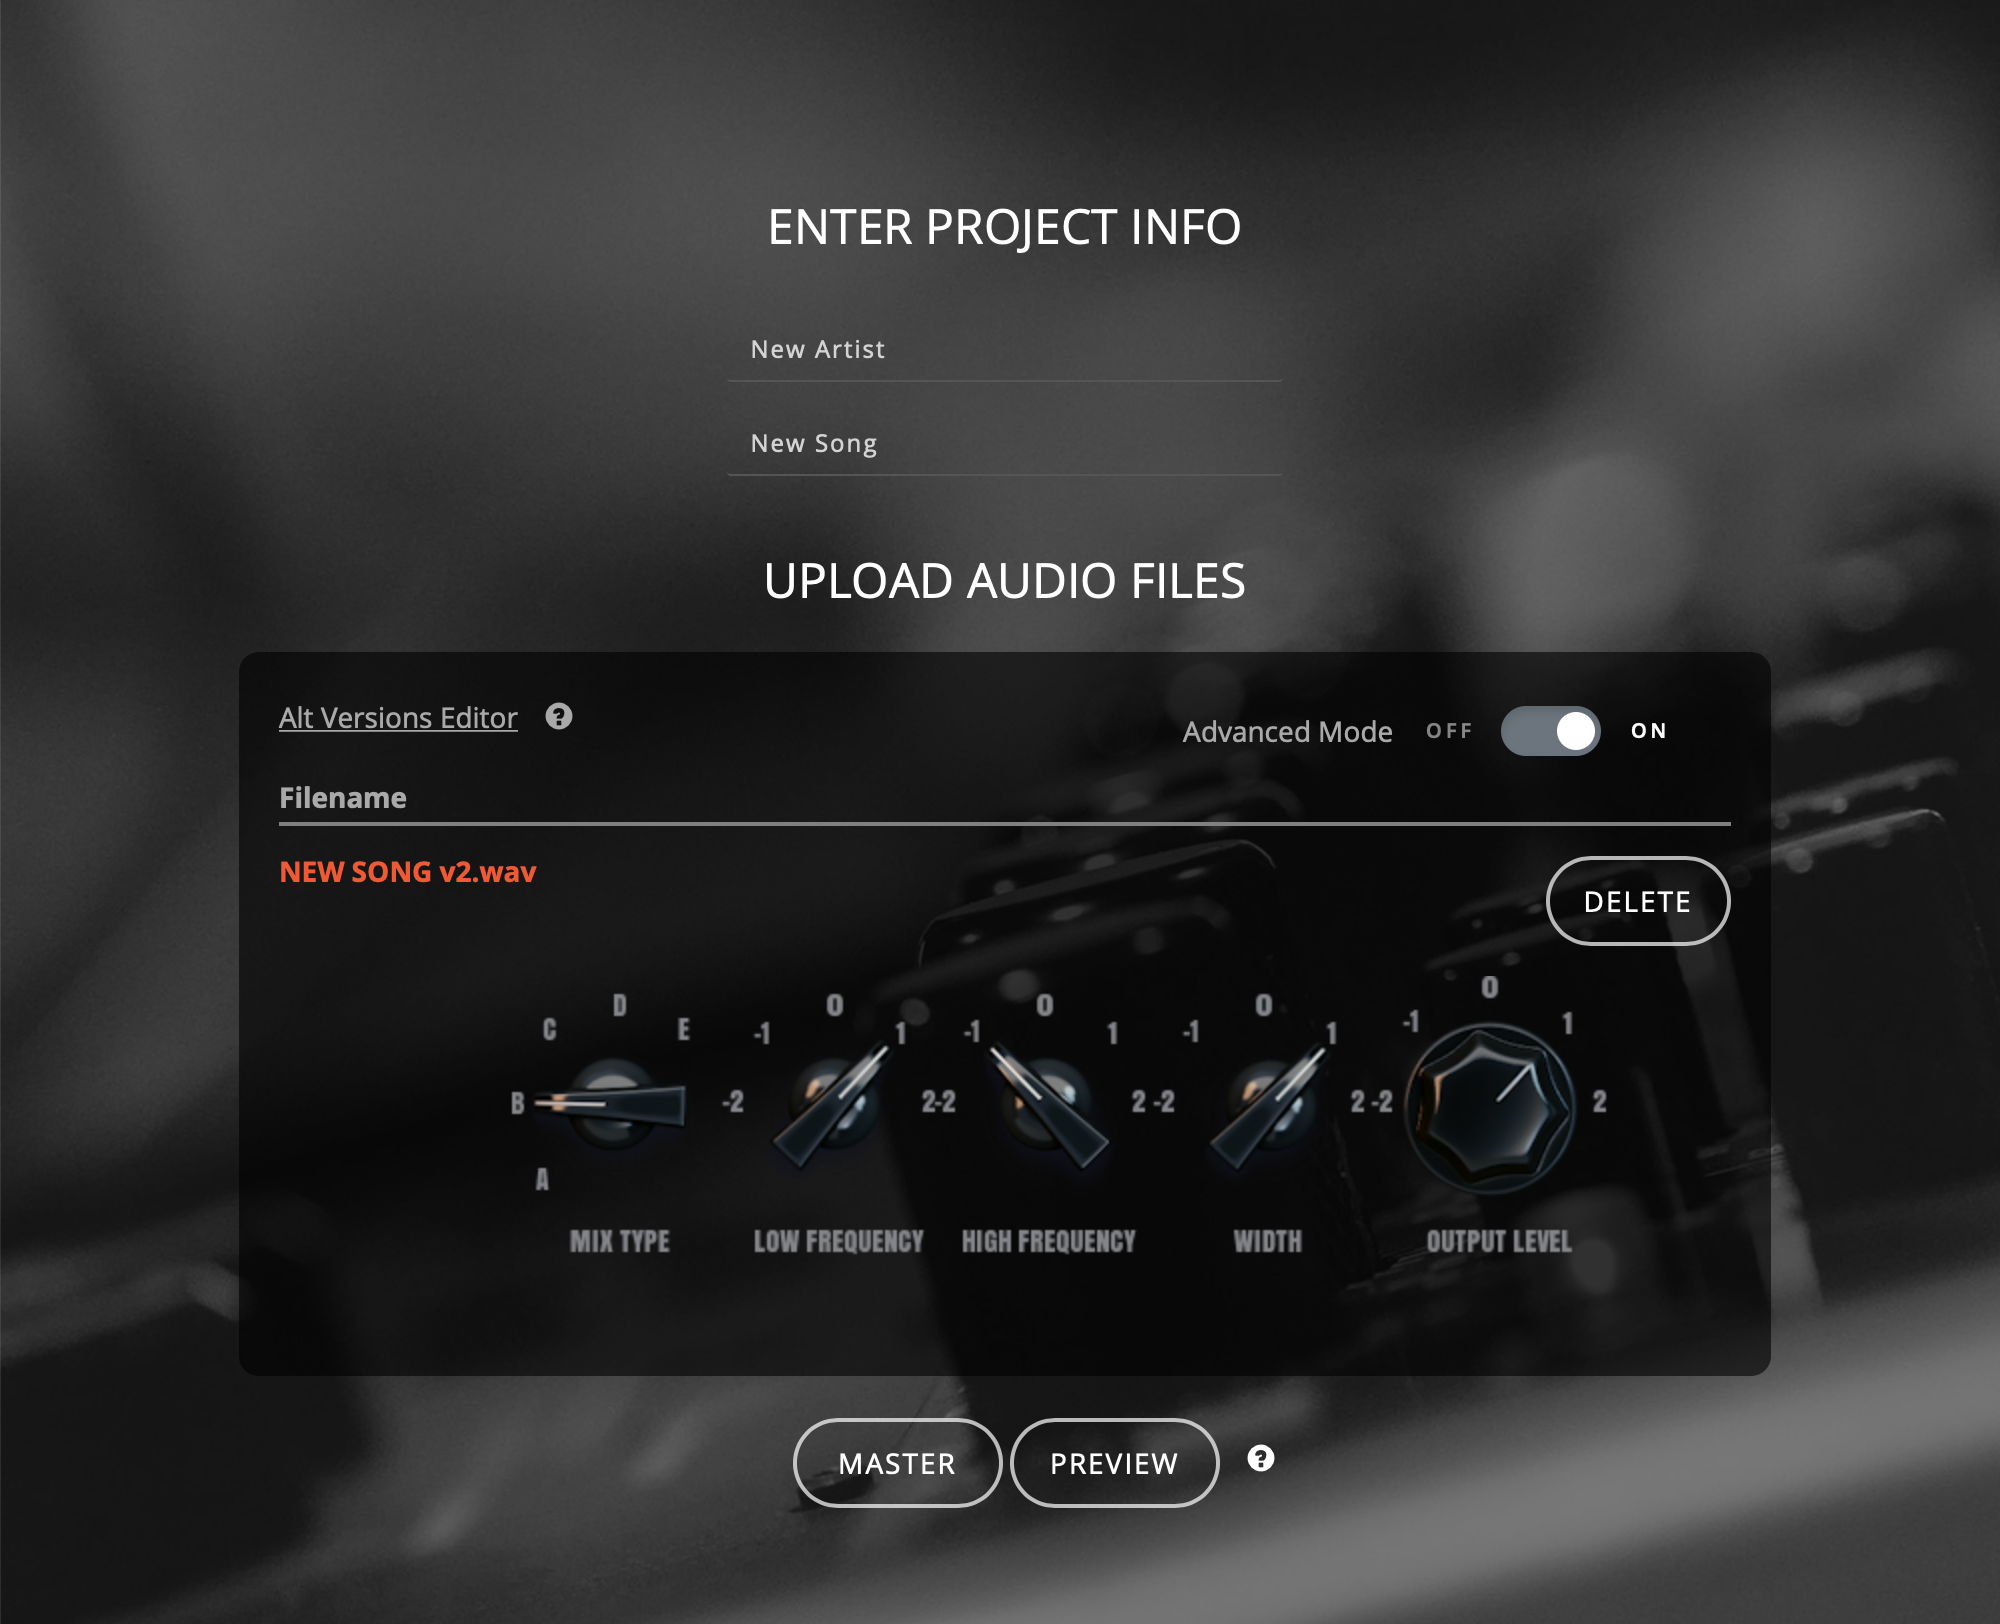
One of the great features of Aria isn’t even gear-related–it’s Aria’s Remastering function. You can remaster your song up to five times for no extra charge. Not only can you test different Mix Types, but you can use Advanced Mode to fine-tune adjustments, which lets you EQ your song letting you dial in the perfect combination. And you don’t even have to upload your song again!
Aria replaces the digital processing used by many other online mastering services with genuine, analog outboard gear. And just like using that gear in real life, sometimes tweaks are necessary to get the best sound for your song out of the gear. Aria’s Remastering Module lets your do just that. You can adjust four aspects of your master–Low Frequency, High Frequency, Width & Output Level. Each of these simple controls plays a crucial role in how your master sounds. Here are some details on what each one does, and when to use it.
Low Frequency: Fine controls the low-end settings of the analog EQ
High Frequency: Fine controls the high-end settings of the analog EQ
Width: adjusts the M/S width using an analog processor
Output Level: adjusts the Output level of the analog mastering console
These four controls give you hundreds of unique combinations that can help you dial in the perfect sound for your master.
So experiment with your song. Add some low end, try a different Mix Type or narrow the stereo field to maximize impact. Playing with all the settings is the best way to learn how to use Aria so that you’re getting the most out of it.
Not Just For Songs
Even though Aria’s all-analog mastering system is built for mastering mixed songs, that’s not all you can use it for. Tons of producers and engineers use Aria on samples, vocals and more, all before putting them into their mixes. Sometimes a drum loop needs a little warmth. Running the sound through Aria is a perfect way to give it the punch it needs to fit in the mix. Aria is also great for spoken word tracks. If your podcast needs some polish, Aria can help. Keep in mind that Aria has a limit of 20 minutes per file, so you might have to split longer files into two parts (Aria’s subscriptions are great for something like this!)
Wrapping It Up
Aria is simple and powerful, but with easy-to-use settings that can help you dial in the perfect sound. Remember to listen to your master on as many devices and speakers as possible, and use the adjustments in advanced mode (Remastering Module) to tweak your master. Don't be afraid to try something different, because Aria lets your remaster your track up to five times.
Use these tips (along with the great library of AriaU tutorial videos) and you’ll be mastering like a pro in no time!